Launching Your First Task with Thunderflow AI
Now that you've connected your AI provider and model, you're ready to experience Thunderflow AI in action! This guide walks you through your initial interaction step by step.
Step 1: Access the Thunderflow AI Interface
Locate and click the Thunderflow AI icon () in the VS Code Activity Bar (the vertical toolbar on the side of your window). This opens the interactive chat interface. If the icon isn't visible, please verify that the extension is properly installed and enabled.
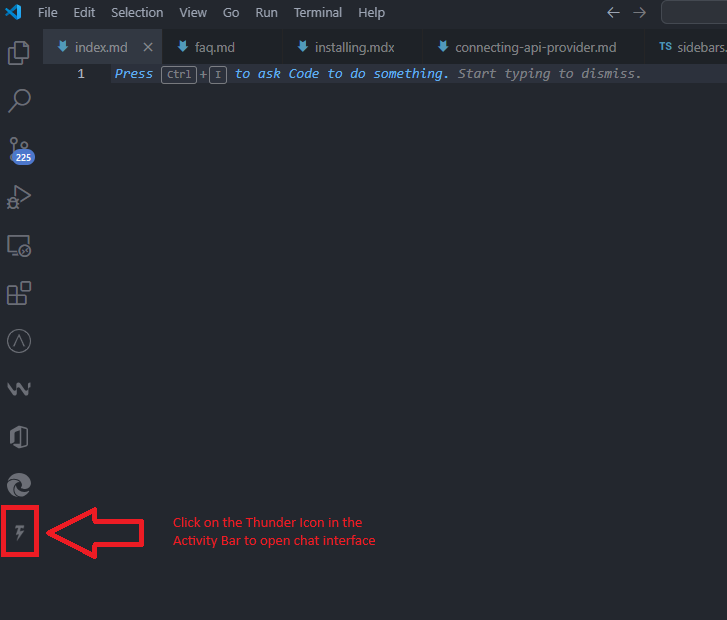
The Thunderflow AI icon provides direct access to the AI assistant interface.
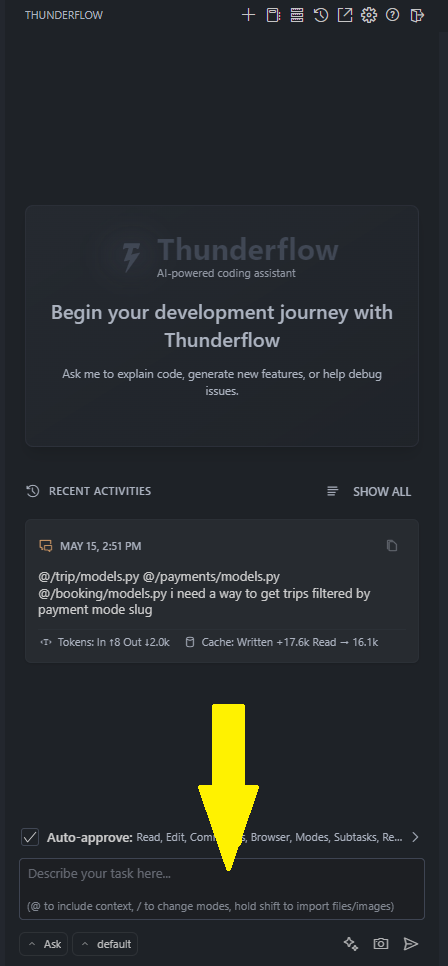
Step 2: Formulate Your Request
In the chat box at the bottom of the panel, enter a clear, specific description of what you'd like Thunderflow AI to accomplish. Here are some effective example requests:
- "Create a file named
hello.txtcontaining 'Hello, world!'." - "Write a Python function that adds two numbers."
- "Create an HTML file for a simple website with the title 'Thunderflow test'"
Thunderflow AI understands natural language—no special commands or syntax required.
Express your needs in everyday language—no special syntax needed.
Step 3: Submit Your Request
Press Enter or click the Send icon () to transmit your request to Thunderflow AI.
Step 4: Review and Authorize Actions
Thunderflow AI analyzes your request and proposes specific actions to fulfill it. These may include:
- Reading files: Displays file contents it needs to examine
- Writing to files: Shows a detailed diff highlighting proposed changes (additions in green, removals in red)
- Executing commands: Presents the exact command it intends to run in your terminal
- Using the Browser: Outlines browser interactions (click, type, etc.)
- Asking questions: Requests clarification when additional information is needed
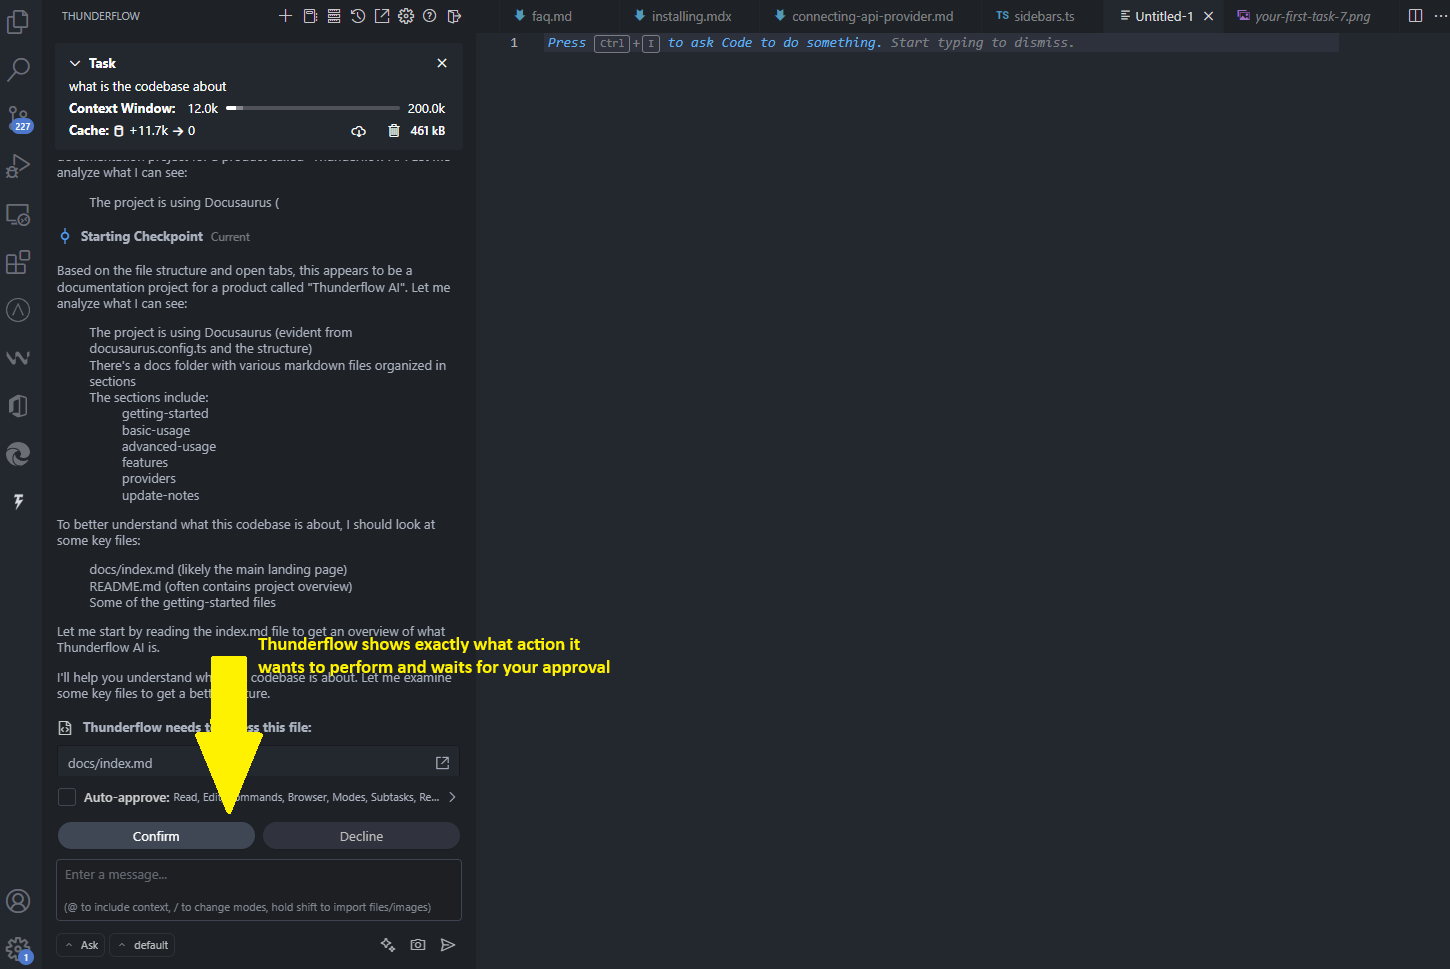
Thunderflow AI displays exactly what action it intends to perform and awaits your authorization.
Each proposed action requires your explicit approval (unless auto-approval is enabled):
- Approve: Click the "Approve" button to authorize and execute the proposed action
- Reject: Click the "Reject" button and provide feedback if the action doesn't meet your expectations
Step 5: Collaborate Iteratively
Thunderflow AI works through tasks step by step. After each action, it awaits your feedback before proposing the next step. This review-approve cycle continues until your task is complete.
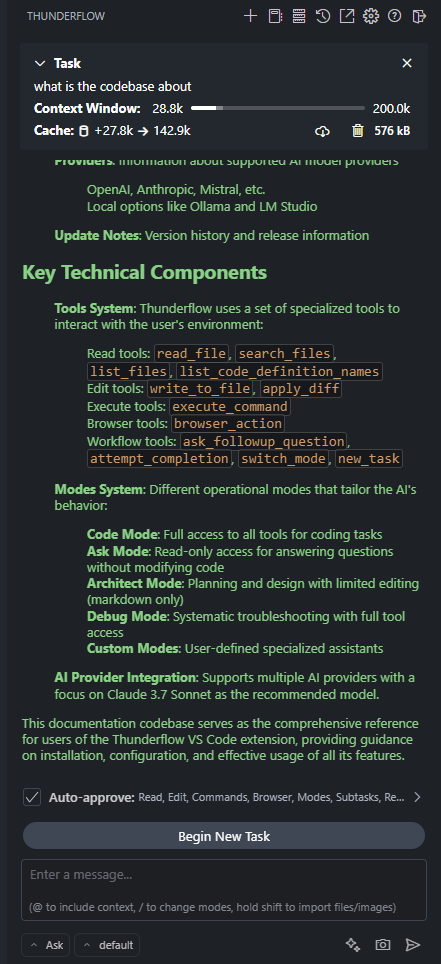
Upon task completion, Thunderflow AI presents the final result and stands ready for your next instruction.
Conclusion
Congratulations! You've successfully completed your first task with Thunderflow AI. Through this process, you've learned:
- How to communicate with Thunderflow AI using natural language
- The approval-based workflow that keeps you in complete control
- The iterative approach Thunderflow AI uses to solve problems methodically
This collaborative, approval-based workflow forms the foundation of Thunderflow AI's operation—allowing AI to handle repetitive coding tasks while you maintain full oversight. Now that you understand the fundamentals, you're prepared to tackle more complex challenges, explore specialized modes for different workflows, or try the auto-approval feature to streamline repetitive operations.